How to mulch
Mulching is one of those really simple tasks that provides a whole host of benefits to your garden, all for a small amount of time, effort and money.
Mulching your beds helps to encourage healthy soil, meaning your plants will grow more happily and with less assistance, which in our book is always a good thing. But if you’re not sure what exactly mulching is all about, or how to go about doing it, read on for an overview…
Why mulch?
The benefits of mulching are multiple! Firstly, and perhaps most importantly, mulching helps to reduce water loss from the soil, so is especially good for freer draining soils, or to use in the Spring time before the warmer months. (And if your soil loses less water, you also need to water it less frequently, which is better for the environment as well as meaning less work!)
If you’re using a biodegradable mulch, which we’d recommend, it improves the soil’s fertility as the mulch breaks down even more and adds nutrients into the soil. It also encourages more soil creatures, like worms, who are drawn to the additional nutrients, and will drag it through the soil, helping to spread the nutrients around as well as improve the structure of the soil by aerating it with their tiny tunnels.
It can also help to suppress weed growth, though we do find that plenty of weed seeds are quite happy rooting themselves in the mulch itself, so this isn’t (sadly) a fool proof way of reducing the need to ever weed again.
If applied in the Autumn, the extra layer helps to prevent some of the worst damages of frost and cold temperatures for the plant roots, acting a bit like a blanket over the top layer of soil and keeping it a little warmer.
And, finally, most mulches look nice too – leaving the beds looking smarter than if they just have exposed patches of bare earth.
What to use?
The best mulches, in our opinion, are the ones that break down further once they’ve been put onto the soil. These are the biodegradable mulches, and they add nutrients to your soil when they decompose. Because they continue to break down, they need to be reapplied more often than non-biodegradable mulches, but we think their benefits easily make this worth the extra effort.
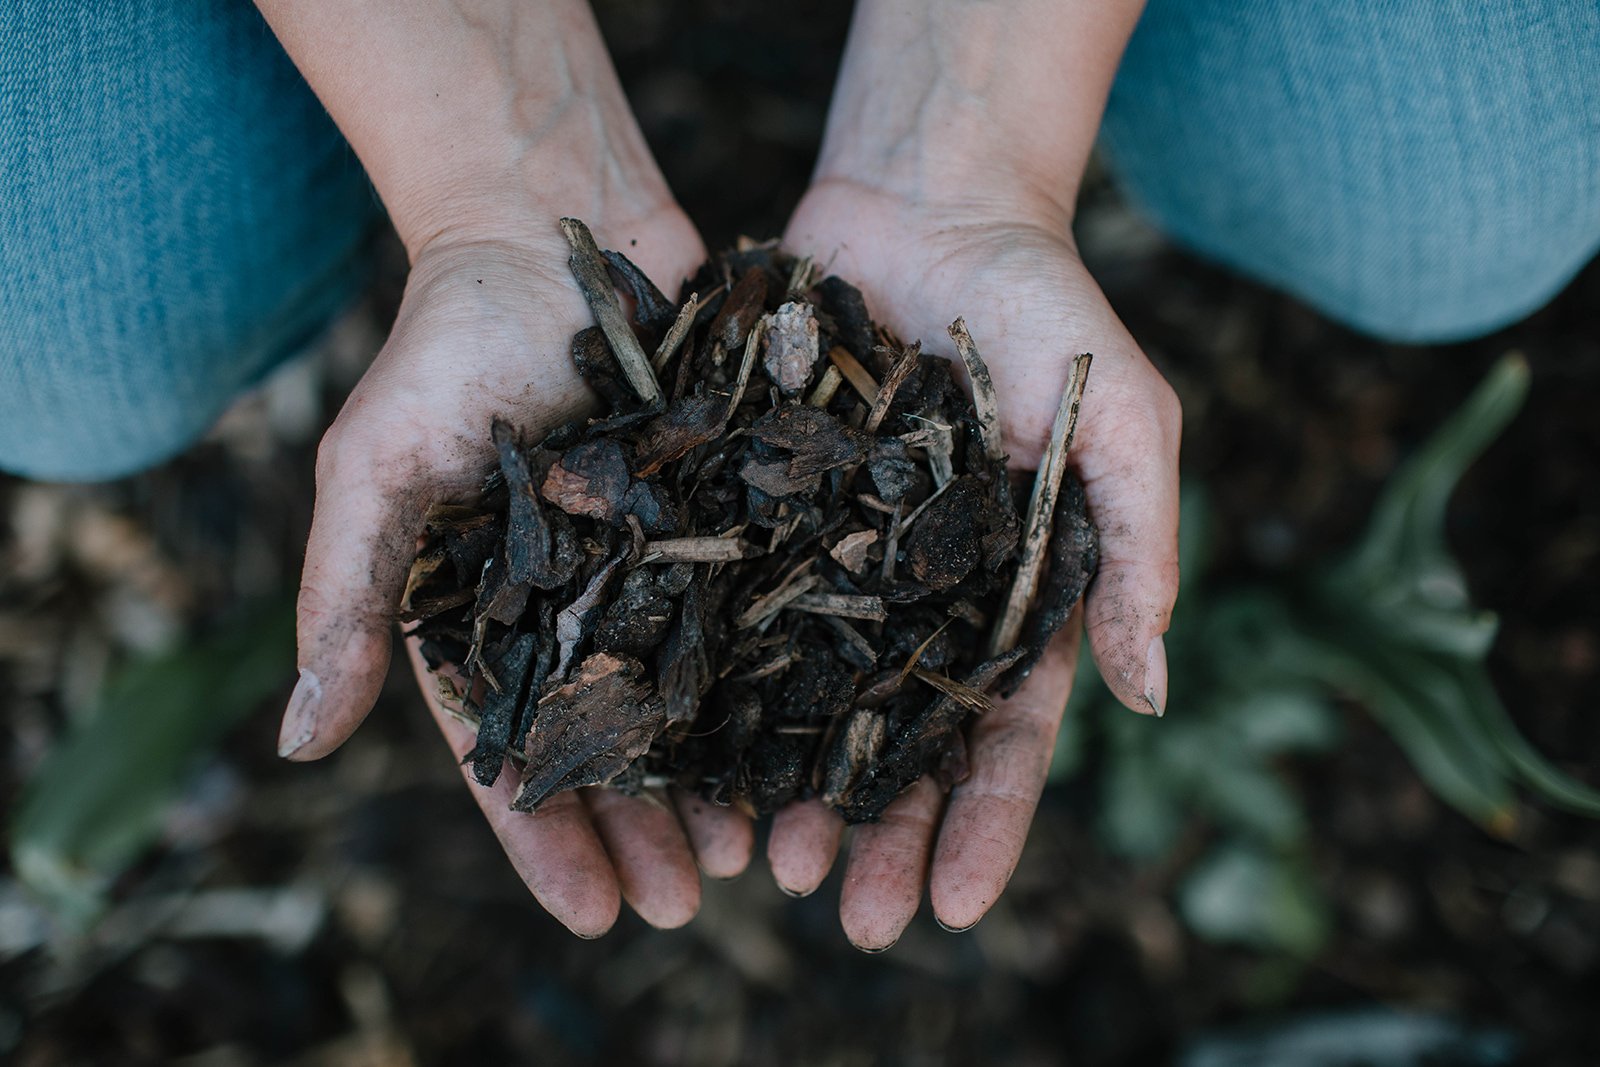
Woodchip mulch is perhaps the best known of these. You can buy it in bags from garden centres and nurseries (or order in large quantities online). This is exactly what it sounds like, a collection of woodchippings, which have been partially broken down already. This tends to look quite attractive, usually a dark brown colour that matches natural soil, and is easily available and relatively cheap. All in all, it’s a great option.
You can also get hold of fresh wood chippings as they are (for example from a tree surgeon’s chipper, or just from chipping any of your own prunings) but there are a few points to bear in mind if you’re doing this. Firstly, any wood chip mulch you buy in bags will have already been sterilised and come from a reliable source. Using wood chippings that you’ve obtained directly, there is a chance that there could be diseases in the wood that you would spread onto the soil (and often trees can be removed for a specific reason, for example if they have honey fungus, and if you then used the chippings of this tree, it would spread the honey fungus to your soil…)
There are also certain trees that have chemicals in which actually inhibit the growth of other plants, for example walnut trees, the Juglans family produce a chemical called juglone that actually stops other plants growing. Obviously, you wouldn’t want to apply a lot of chipped walnut timber to your flower beds!
So, if you want to make your own woodchip mulch, it’s important to know where the woodchip has come from and to let it rot down for at least a year before applying it.
Other mulches
Leaf mould is another great mulch, and is easily made in your own garden. In Autumn, gather up all of the fallen leaves, put them inside a plastic bin bag, poke a few holes in to let air come through, and just leave them somewhere out of the way for a year or two… The leaves inside break down to produce a substance that is really excellent as a soil improver. Different leaves break down at different speeds, and especially thick leaves could be shredded before being added, to help speed up their decomposition. The only problem with leaf mould is that it can quite easily get filled with weed seeds. The longer you leave it for, the greater the chance of the seeds dying off…
Garden compost is another mulch that is very high in nutrients. This can be used straight from a compost bin and, carefully, spread out across beds. It is less attractive than the other mulches (and harder to spread as it tends to be quite sticky) but provides excellent fertility for the soil. Make sure that anything you use has completely broken down before placing it onto the beds. This is another time where weed seeds can quite easily get into the mulch, so keep an eye on any emerging seedlings…
Non-biodegradable mulches tend to be used mostly as decorative finishes, though they also help to protect the soil. Gravel is a popular choice, especially for the dry garden style popularised by Beth Chatto. Other stones such as slate, or generic “pebbles” are also often used.
How to do it?
Mulching is best done in Spring, when it helps to conserve moisture in the soil for the drier months ahead, and/or Autumn, as the herbaceous plants start to go dormant, when it helps to warm and protect the soil from the cold of the Winter months.
Mulch should be applied to soil that is already wet, so plan ahead with the weather forecast and aim to mulch after there has been a good rainfall.
Before mulching, weed the beds and remove any other debris, like fallen branches and twigs or old leaves. (If you’re mulching in Autumn, collect all the leaves together to turn into leaf mulch, which you can use to mulch with the following year!)
The actual application is pretty straightforward. Wearing gloves, you just grab handfuls of your mulch and spread it around on the beds. It helps to work systematically, from the back of the bed towards the front (that way you don’t need to walk over mulch you’ve just put down) and from one side to the other. Put the mulch over the bare soil, and be careful to leave a gap between mulch and plant stems. Resting the mulch right up to the stems, or leaves, could cause the plant to rot, or give it a disease as the mulch breaks down.
According to the RHS, the ideal depth of mulch is between 5cm and 7.5cm deep. It’s unlikely you’re going to get a ruler out and start measuring though, so a very rough visual guide is to make it about as deep as a thumb. Use your hands to spread it out and make it an even depth across the beds.
And that’s it! Leave the mulch as it is, where it will start to break down even more, and get dragged down into the soil by worms, helping to improve the fertility, preventing water loss, and (hopefully!) stopping so many weeds setting seed…


